Cheap DIY Furniture Transformation
4 hours
$5 Materials
$30 Equipment
Drill
Screwdriver
Painting kit
Painters tape
Wood color
Handles
Today we are going to learn about how to repaint an old furniture or cheap furniture makeover, how to add new hardware, how to create a stunning pattern with only masking tape and what to do if you want to change to color of the pulls.
This project is a part of my parents’ guest room makeover.
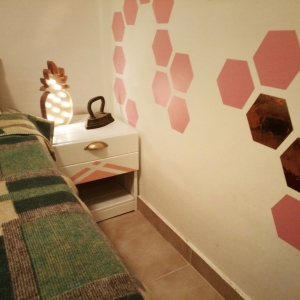
I already wrote about the hexagon sticker wall, the washi tape wall art, and about repainting the laminate closet, and it finally time to write a few words about the drawer makeover.
I have these drawers ever since I was 16. I got them from the shopping channel together with the Futon bed that was really trendy in the 90s. They came in natural wood color and I painted them with a fluid green pattern with the cheapest Gouache paint I found.

Three years ago when I decided its time for a makeover, the two drawers were the first candidates to be repainted.
The process was super easy except for one little problem. The Gouache Paint got dissolved by the new coat. At 16, due to extremely low budget, I didn’t varnish over the gouache but let’s go over the steps and see what we can do.
These instructions are valid for painted and varnished furniture. if you want to paint over laminate you should read this post for a few more steps including a primer layer.
If the furniture has hardware like handles or knobs you should remove them first.
Step 1: Sand the furniture
Sanding helps to remove bumps, smooth out scratches and will allow the paint to stick better.
There are some “sand-free” products in the market but I highly recommend sanding the furniture if you want the paint to last for many years.
Use a fine grade sanding paper, 100-180 grit should be fine.
Step 2: Clean the surface
Use a soft cloth to wipe off the dust from the sanding. If the furniture is dirty with oily or other hard stains, you should clean accordingly with detergents.
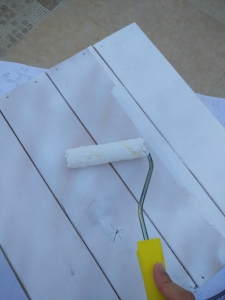
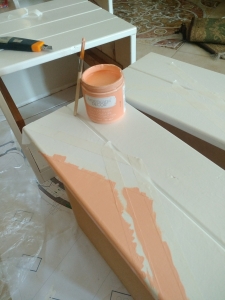
Step 3: Paint the Furniture
As I mentioned, the gouache got dissolved, so I decided to first spray paint it white quickly, and then to proceed painting.
I applied 3 coats of white paint from a local brand. I used acrylic paint with a silky finish. This type of paint doesn’t require a topcoat or sealer.
For a professional finish, I like to lightly sand in-between each coat with a fine-grit sanding paper.
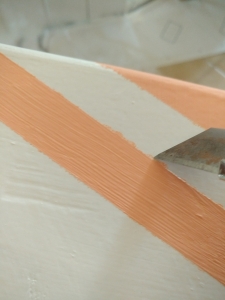
Step 4: Decide on your desired pattern and create it with masking tape
This is a really simple hack to create a precise pattern. If you follow my blog you probably already noticed I use masking tape all the time on walls and furniture.
Silly me, I forgot to take pics of how I created the pattern but here is how it looks at the end:
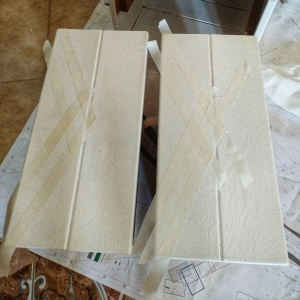
Basically I stretched the tape from each upper corner to the lower center. then I taped another two strip exactly beside the first ones, and then two more, And finally I removed the central ones, and ended up with perfectly parallel strips I can paint over.
I used the same trick, on this IKEA hacked chest.
Step 5: Paint the pattern.
I used the Americana decor brand, I bought some jars on sale a couple of years ago, but you can use any suitable type you’d like.
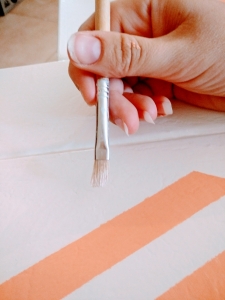
Step 6: Peel
If you need to know one thing about me is that I love to peel masking tape. So.. peel and enjoy!
Step 7: Finishes and touch-ups
As you can see, even though I used masking tape I came up with many smudges. It’s important to tighten it well before painting, but it’s almost impossible to avoid spills and smudges. I used a utility knife to scrape the paint but it’s also possible to use sandpaper very gently and then used a small brush with the original white paint.
Step 8: Add the pulls
I had silver 2 pulls I ordered from Aliexpress, but when I was just about to attach them, I decided the golden color would be more suitable. So I spray painted them.
In this project, the drawer had no pulls before so I had to drill new holes. Be sure you mark the place for the holes accurately.
Take the precise distance between the holes of the pull, then use a ruler and a level to mark the desired holes, and only when you are absolutely sure, drill the new holes. After you drilled the perfectly leveled and centered holes, attach the new handles.
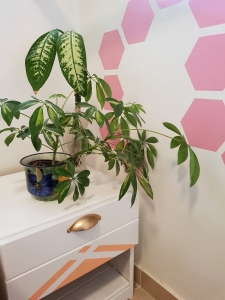
And that’s all.
Enjoy your cute new furniture.
Make sure you follow me on IG to see the projects as they happen.
Till the next post!