Gradient geometrical accent wall.
WOW effect guaranteed!
4-6 hours
$20 Materials
$15 Equipment
Wall painting and preparation kit
Plastic container and knife
Scissors
Colored paint
White paint
Painters tape
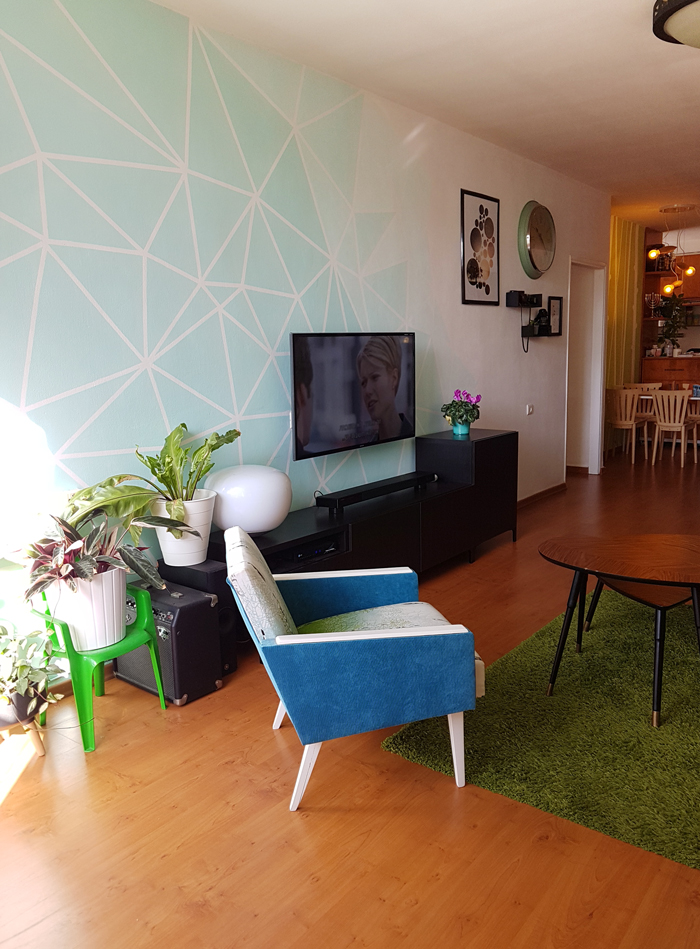
A few weeks ago, our apartment was featured in an Israeli online magazine. I received a barrage of questions regarding my TV wall (My non-Hebrew speakers can scroll down to the bottom and check out the last picture).
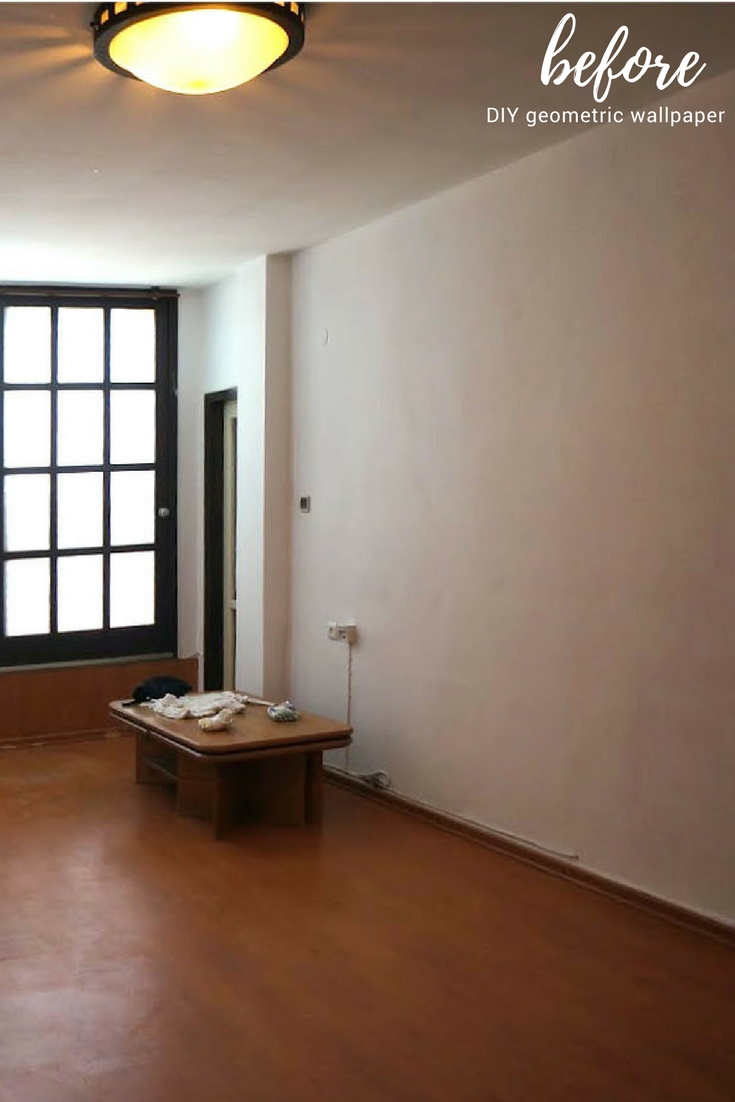
The article shows the current state of our home, after almost two years of an ongoing makeover project so here is a glimpse of the big change.
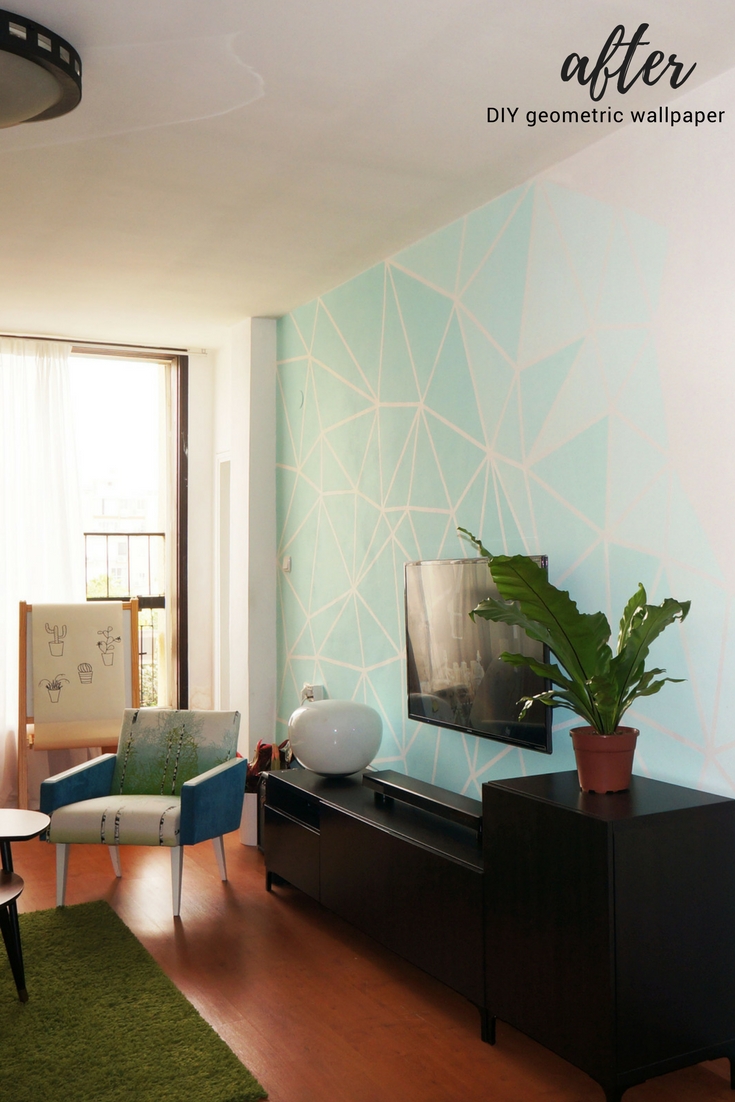
Before and after
Pinterest is full of many variations on this basic idea, but I do believe that this one is originally mine and I was absolutely the first one to pin it!
I am proud to introduce you to my living room TV accent wall.
So.. Shall we begin?
Step 1: Have the room ready for a mess and prepare the wall for painting.
I’ve written about it extensively in the Bamboo Accent Wall post, so you can check it out if it’s your first wall painting project.
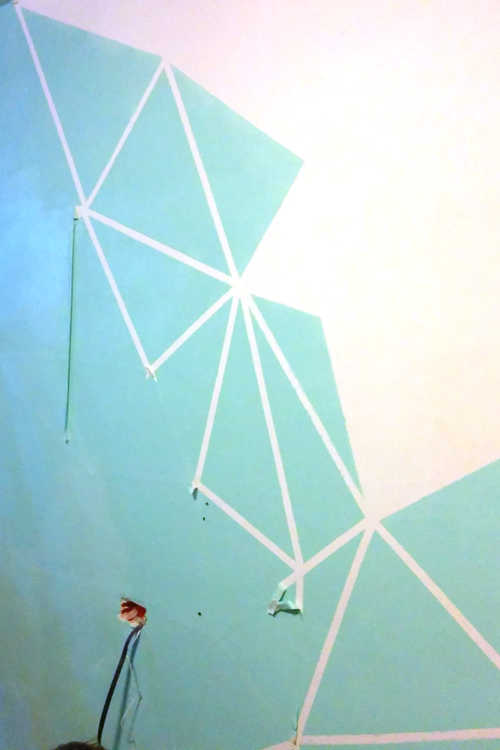
Step 2: Start taping!
I used masking tape in order to create the pattern, as usual.
You will see many examples where the tape creates random polygons pattern. I think that keeping all the polygons triangular leads to a better looking result.
I didn’t want to paint the entire wall, but to finish it gradually. Therefore, I terminated the triangular pattern in a roughly diagonal way.
In this case I didn’t had a real, proper painters tape, and the type I used is a bit risky. The tape is quite strong so sometimes when you peel it off, it pulls out parts of the base paint.
The way to avoid this problem is to “weaken” the tape before applying it, by taping it first to a piece of fabric and only then taping it to the wall. Don’t forget to contour the wall with the tape as well to avoid painting the ceiling and the adjacent walls.
Step 3: Paint!
Choose a base paint for the darker section of the wall. My pick was a beautiful phosphorescent turquoise.
Paint the section of the wall you wish to be the darkest shade according to the paint’s manufacturer instructions. When you paint over the tape, try to squeeze the tape gently with your finger along the edges, to avoid paint from sneaking under the tape.
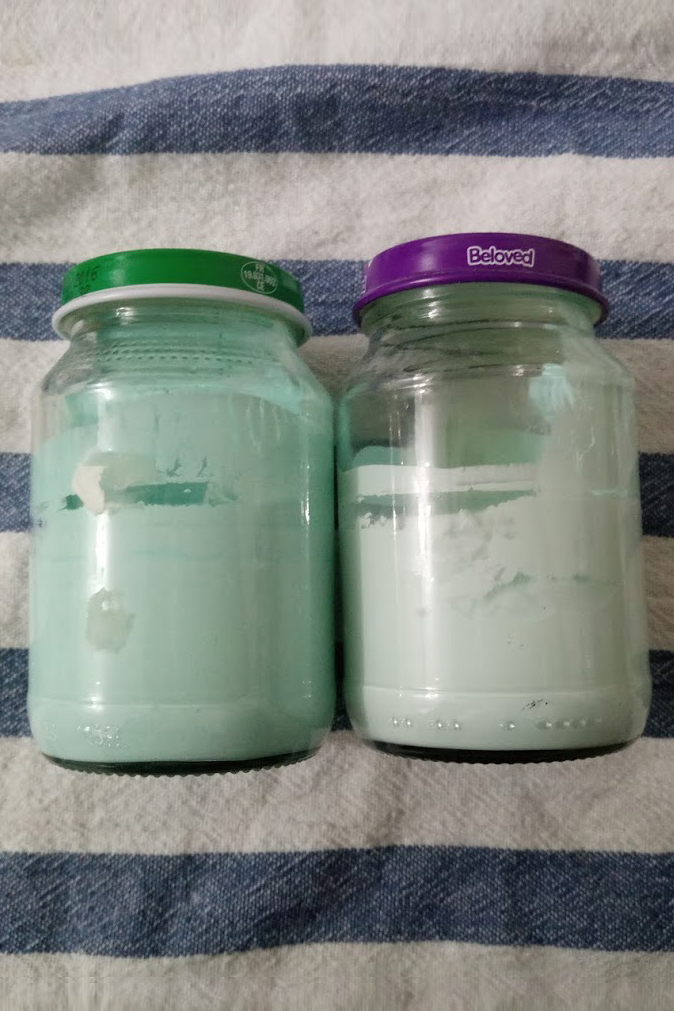
Pour some paint into two clean jars from the paint container. Estimate the amount of paint required to cover the wall and it is always better to have a bit more than less.
In the first jar, mix the base and white paints in the ratio of two thirds base to one third white. In the second jar, mix them in the ratio of one third base and two third white. Paint the other sections of the wall accordingly.
Step 4: Peel..
As you probably know by now, this is my favorite part!
As soon as the paint is dry to touch, start peeling gently and slowly.
If you wait too much, the paint will harden over the tape and will be pulled out of the wall when peeling.
Step 5: Finishes and touch-ups
After all the tape is gone, go over with a small brush and fix any smears. Use the base paint (in our case – white) and the new paint where needed.
And that’s all. We’re done.


And if you want to watch my projects while they’re happening, just follow my Instagram stories!

Hey, great post! Super inspiring. I really like DIY, woodworking (and|&) renovation activities. Thanks so much.
Great idea! It looks so great. I would love to do this.
What a great idea! It turned out beautiful, I love the gradient look!
I love the design, I’m actually thinking of redoing the accent wall in our living room !!!
The Geometric Ombre Wall look super cute. I was wondering if i will be able to do it. But surely going to give a try following your instructions.
How clever! That’s such a creative wall and I love that it doesn’t cost much for such a “wow” look!!!
Good post and right to the point. I don’t know if this is really the best place to ask but do you people have any ideea where to employ some professional writers? Thank you 🙂